
Has it been a while since you last put a tank, BC and regulator together? Do you remember the steps involved? This four-minute video will walk you though the key points.
Here are the steps covered in the video. You can print this page if you would like something to refer to.
- Start by gathering your BC, regulator, tank and weights together on a flat surface, within arm’s reach. (This way you won’t have to leave your tank standing unattended while you retrieve a missing item.)
- Inspect the tank valve or DIN connector to make sure that there is an O-ring in place and that it is in good condition.
- Stand the tank upright with the valve orifice facing away from you and the valve turnwheel on your right. This way it will be as though you are dressing an invisible diver who is facing away from you. The diver’s right will be your right and his or her left will be your left.
- Hold the BC upright and slide the cam band down over the tank. If the BC has a tank height adjustment strap, slip it over the valve. This will help support the weight of the BC and ensure that the tank is always at a consistent height.
- Flip the cam buckle over so that it locks securely in place. Need help threading or adjusting the cam buckle? Ask your divemaster or instructor.
- Check to make sure the cam buckle is secure by grabbing it and trying to move it up and down. It should move very, very little or not at all.
- Pick up the regulator first stage and remove the dust cap.
- Orient it so that the yoke screw or DIN connector is pointing back towards you. Rotate the first stage so that the second stage(s) are on the right and the console and BC inflator hose are on the left.
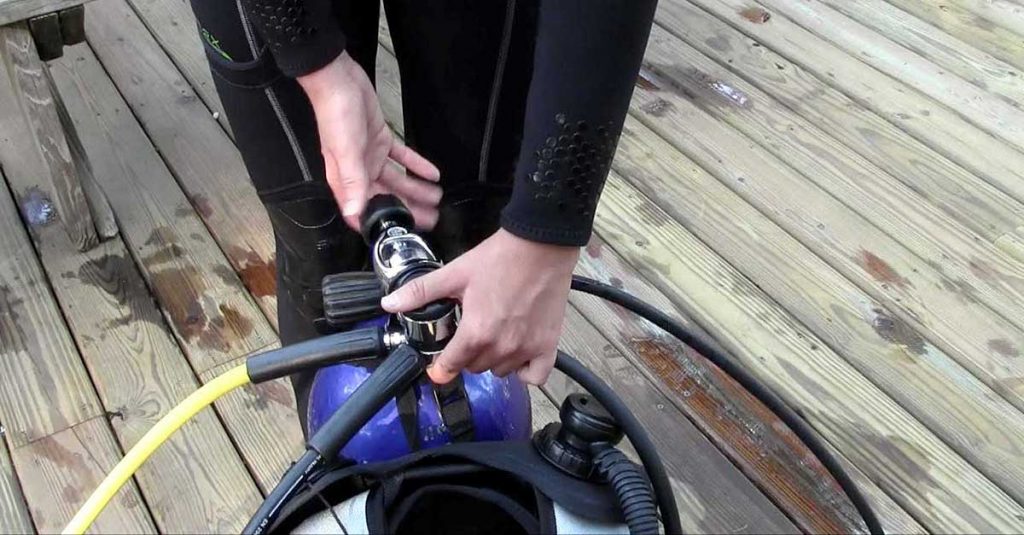
- Mate the first stage inlet to the tank valve outlet. Make sure everything is properly aligned. The first stage should be on the side of the valve opposite where you are standing.
- Turn the yoke screw or DIN connector until it is finger tight. Do not overtighten.
- Before turning the air on, connect the low-pressure inflator hose to the BC power inflator. It will be easier to do this now than later.
- While pointing the pressure gauge away from you take the valve turnwheel in your right hand and turn it back towards you just far enough that you hear the regulator pressurize. If you hear air leaking, shut the valve and fix the problem before continuing.
- If the regulator pressurizes successfully, and you don’t hear air leaking, check to make sure you have enough air. Then gently turn the valve on all the way.
- Depress the primary second stage purge button just enough to blow out anything that shouldn’t be inside the regulator. This should take less than a second. If the second stage starts free flowing, put a finger over the mouthpiece opening to stop it.
- Test breathe the primary second stage to ensure it is working properly. If it is, repeat the process with the alternate-air-source second stage. If it isn’t breathing properly, ask for help.
- Remember that alternate-air-source second stages and gauge consoles should never be allowed to dangle freely. Secure the alternate-air-source second stage in its holder and clip the console to a D-ring on the left side of the BC.
- Insert any weights or weight pockets, ensuring that they are locked firmly in place.
- If you will not be getting in the water immediately, turn the air off so that it does not leak out. Just remember to turn it on again before entering.
- Do not leave your assembled scuba unit standing upright unattended. Either secure it in a tank rack or lie it down on its back. Do not lie the tank on top of the BC.